
Disclaimer: The information posted in this blog and on this website are not necessarily reflective of the views or recommendations of Microsoft. Though I am an employee of Microsoft, this is considered a personal project of mine that is not intended to be a recommendation or guide from Microsoft the company.
Introduction
In this blog post I will detail the steps needed to create customized email reports based on Microsoft Defender for Endpoint (MDE) advanced hunting query results. For example, the query in this blog will retrieve the Defender antivirus engine and platform versions along with the antivirus mode (Normal, Passive, EDR Block Mode) per device. The results of this query will be formatted both into an HTML table and into a CSV file which will be sent to security personnel (example pictured below).

Getting Started
You will need a Power Automate Premium license to be able to access the Microsoft Defender ATP connector in Power Automate. More information about Power Automate Premium licenses found here: Types of Power Automate licenses
To begin, head over to https://powerautomate.com and click Create.
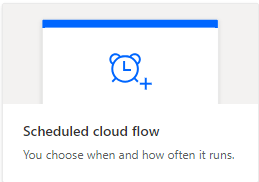
I will be scheduling this flow to happen throughout the week, so I will choose “Scheduled cloud flow”.
Give your flow a name, then choose repeat every week. This will allow the flow to run on certain days of the week. Choose the days you would like the flow to run on then click Create.

Building the query
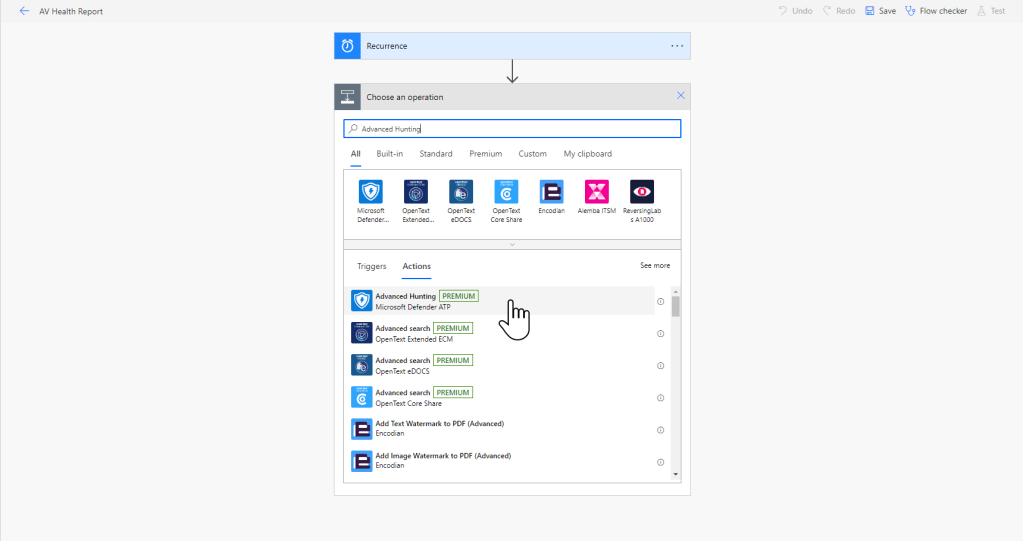
Click the +New step button and select Advanced Hunting (pictured below).
Here you can insert your advanced hunting query. This is the query I will be using, but you can let your creative juices take over on this part!
let AvModeDescription = dynamic({"0":"Normal", "1":"Passive", "4":"EDR Block"});
DeviceTvmInfoGathering
| extend AdditionalFields = parse_json(AdditionalFields)
| extend AvEngineVersion = tostring(AdditionalFields.["AvEngineVersion"])
| extend AvPlatformVersion = tostring(AdditionalFields.["AvPlatformVersion"])
| extend AvMode =  tostring(AvModeDescription[tostring(AdditionalFields.["AvMode"])])
| where isnotempty( AvMode )
| project-away Timestamp, LastSeenTime, DeviceName, AdditionalFields
Creating the HTML table
In this example, I want the flow to deliver an email containing an HTML table of the query results as well as a CSV attachment on the email containing the query results. In order to do this, we must manipulate the data that is returned by our query.
Add a new step and choose the Select operator (pictured below).

In the From field, choose the Results dynamic content then create your mapping. The mapping for my query will look like this:

Notice the ‘^’ character in a couple places. I will be using a Replace operator to replace all ‘^’ characters with spaces. This will allow us to put spaces where we otherwise would’ve been unable to. Additionally, notice the value for the Device Page key. This value will be a hyperlink to the device’s overview page. In order to make this hyperlink work properly, input the following text into the value box:
<a^href="https://security.microsoft.com/machines/v2/@{item()?['DeviceId']}">Device Page</a>Note that the same concept applies if you wish to link to a specific alert ID or incident ID.
Now, we will create our HTML table. Add a new step and choose Create HTML table.

In the From field of the HTML table, choose the Output dynamic content from the Select step. Note, I wont be modifying any of the advanced options. It should look like this:

Next, we will insert the Replace operator I mentioned earlier so we will add a new step and choose Compose. Add the below line as the Inputs for the Compose step.
@{replace(body('Create_HTML_table'),'^',' ')}Your flow should look like this:

Creating the CSV table
Now that our HTML table is ready to rock, we’ll move on to the CSV table. The process is very similar here. Add a new step and choose Create CSV table. In the From field, choose the Results from the advanced hunting step then insert your headers and values.

Note for hyperlinks to work in the CSV file, wrap the link inside of the quotes below.
=HYPERLINK("Insert link here")Make it pretty
Next, I’ll add one quick step just to make our HTML table look a bit nicer in the email. This step is completely optional. Add a new step and choose Compose. Insert the below CSS code (or your own).
<style>
Table {
  font-family: Arial, Helvetica, sans-serif;
  background-color: #EEEEEE;
  border-collapse: collapse;
  width: 100%;
}
Table td, Table th {
  border: 1px solid #ddd;
  padding: 3px 3px;
}
Table th {
  font-size: 15px;
  font-weight: bold;
  padding-top: 12px;
  padding-bottom: 12px;
  text-align: left;
  background-color: #1C6EA4;
  color: white;
}
</style>
Crafting the email
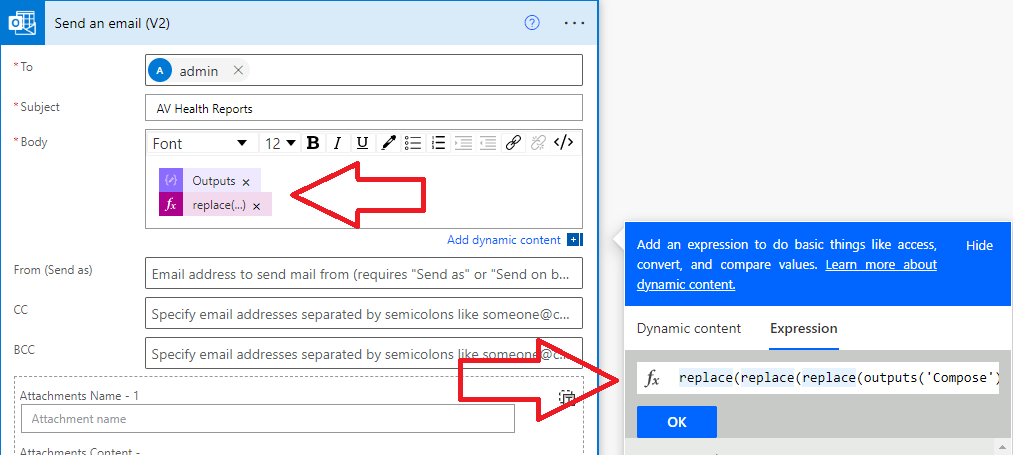
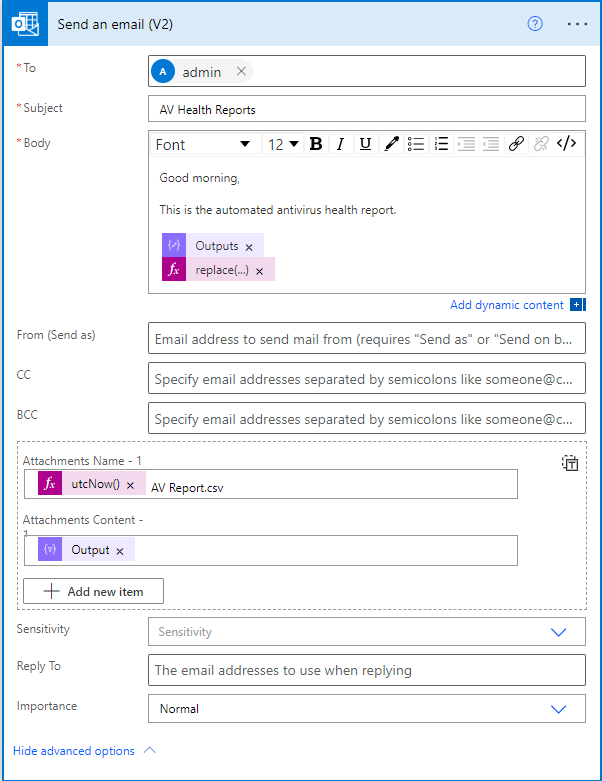
Lastly, let’s put our email together and test our flow! Add a new step and choose Send an email (V2). Of course, create your own email subject and choose who to send the reports to. In order for our CSS styling to be applied, we must add the Outputs dynamic content of the CSS Compose step anywhere in the email body.
In order for the HTML table to be displayed properly with working hyperlinks in the email body, add the below expression to the email body.
replace(replace(replace(outputs('Compose'),'<','<'),'>','>'),'"','"')So far, your email might look like this:
Click the Show advanced options button in the email and we will add the CSV attachment next. For the name, I’m going to use the utcNow expression followed by ‘AV Report.csv’. Note that you must include the .csv.
And for the attachment content, choose the Output dynamic content from the Create CSV table step. Your email should look something like this:
Hopefully, your test should complete successfully and you should have a sweet new automated report flow! Thanks for reading – I hope you enjoyed this post and I hope you can leverage this info to make some of your own advanced hunting report flows.

2 thoughts on “Creating Custom Email Reports with Advanced Hunting and Power Automate”